SpiderGate Studio
The Studio is the SpiderGate workbench: a chat and media composer where the work is kept. Projects hold your conversations and everything you generate, a prompt saves as a named object you can reload or call from an agent, and every run leaves a trace.
Who this is for
Anyone on your team who works with models by hand — writing and tuning prompts, comparing answers, generating images, video or speech — and wants that work to survive the session. It also covers the handover point where a prompt you tuned by hand starts being called by an agent.
What you'll build
By the end you will have a project, a saved prompt inside it, and an agent call that runs that exact prompt without repeating its contents.
Before you begin
You need a SpiderGate dashboard login and admin rights on the brand you want to work in (members can read; writes need admin). Generating media additionally needs a provider key in your Vault, because media keys are per-brand and are never drawn from the shared pool.
The Studio lives at /dashboard/gate. The four modes are query parameters on that one route:
Mode | URL |
|---|---|
Chat |
|
Images |
|
Video |
|
Audio |
|
There is no separate /playground page; that path redirects here.
Steps
1. Open the composer
Go to SpiderGate → Chat in your dashboard. The composer is on the left, the settings panel on the right. Under the message box are the three run modes, Single, Fork and Merge, and the composer controls: Attach, Prompts, History and a JSON toggle.
2. Pick a model and set it up the way you want it
Use the MODEL / ALIAS control in the settings panel, or press ⌘J, or type /model in the composer. You can pick a task alias such as spideriq/creative, or a specific model. Then set the values underneath it: temperature, top P, max tokens, response format.
3. Start a project
Projects are created from the History control in the Images, Video and Audio composers. Open one of those modes, click History, and use the new-project button at the top of the panel. The panel then lists Scratch (no project) alongside your projects; click one to make it the active project.
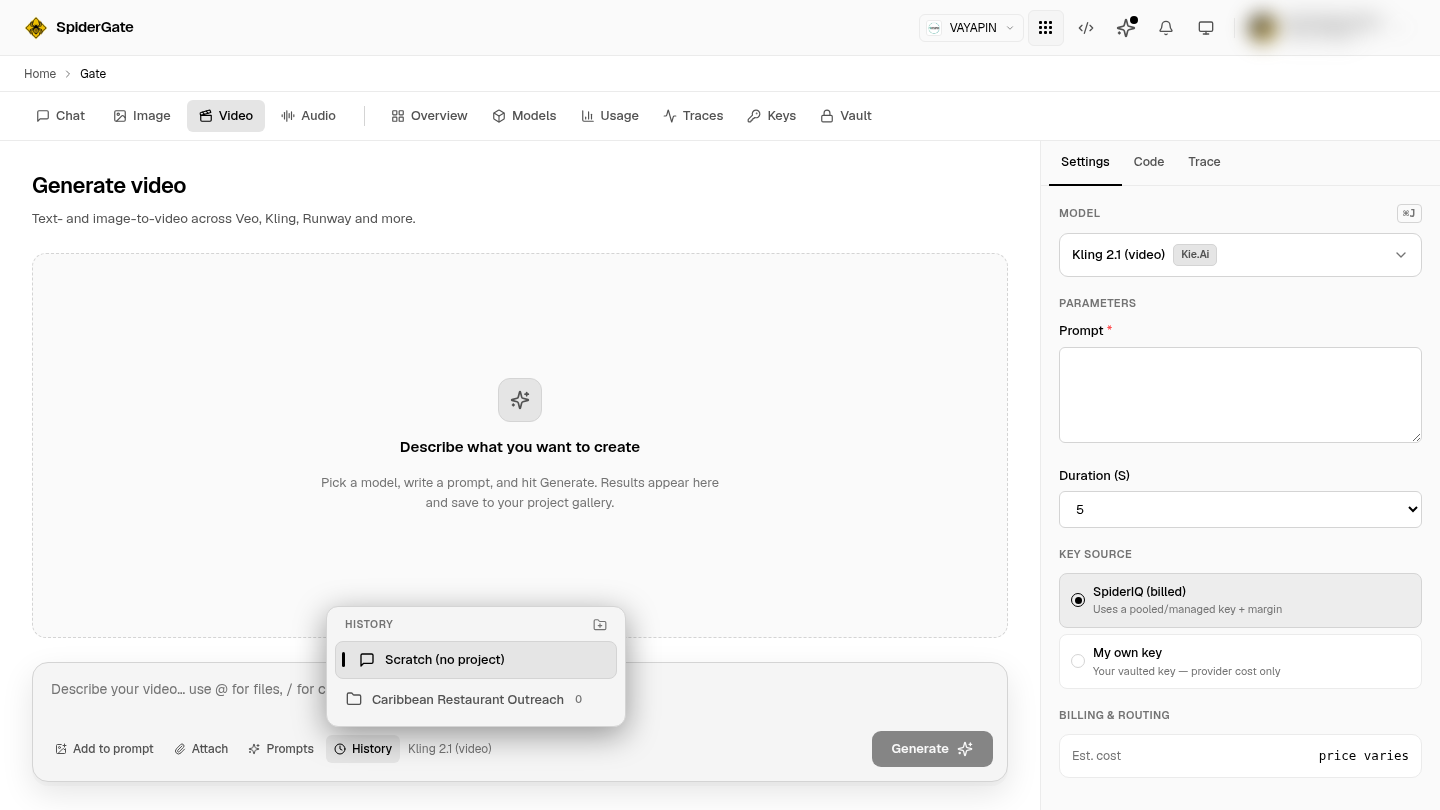
A project holds its conversations, its saved prompts and its generations together. Switching project switches all three.
4. Save the setup as a prompt
With a project selected, open Prompts in the composer and choose Save current setup. Give it a name. What gets saved is the whole bundle: the system prompt, the model, the settings, and any reference media attached.
Names are unique inside a project, so saving over an existing name is refused rather than silently overwriting it.
5. Call it from an agent
The prompt you just saved is addressable. Anything holding your API key can reference it instead of repeating its contents, and SpiderGate expands it server-side.
Tell your agent, verbatim:
Use my saved SpiderGate prompt
prompt:<public_id>for this generation, and set the aspect ratio to 16:9.
Or in a request body:
{ "model": "fal/flux-dev", "params": { "prompt": "prompt:prompt_7382f72b9ee4014a5b23390ce2ed38c5" } }Two reference forms are available:
Form | Resolves | Needs a project id |
|---|---|---|
| anywhere in your workspace | no |
| inside one project | yes |
The handle is the name lowercased with spaces and punctuation turned into underscores, so Venue Blurb becomes prompt.venue_blurb.
Anything the request sets itself wins. The saved prompt only fills in what you left out.
To give an agent this capability, install the @spideriq/gateway-skills package from the OPVS Marketplace; its studio-prompts skill documents the whole surface. The full API is in the Studio API reference.
6. Generate media and keep it
In Images, Video or Audio, the settings panel shows the parameters that model actually declares, plus a KEY SOURCE choice between a pooled SpiderIQ key with margin and your own vaulted key at provider cost, and an estimated cost.
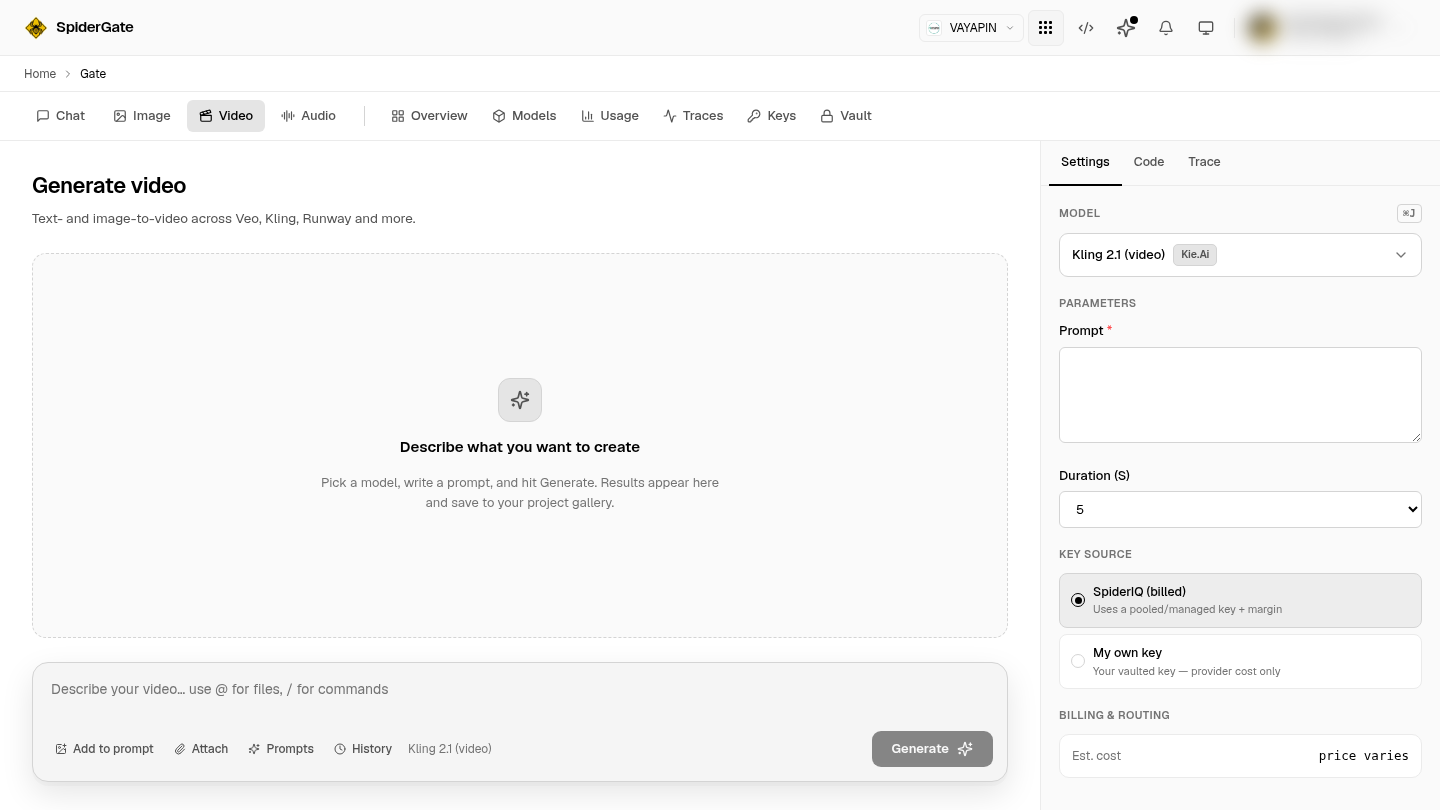
Results land in the project gallery. Click one and Reuse loads its whole recipe back into the composer so you can change a word and run again; Use as reference attaches the result itself to your next run.
7. Compare several models at once
Switch the composer to Fork to send one prompt to several models and read the answers side by side, or Merge to have an aggregator model fuse them into one reply with the raw lanes kept behind a toggle. Pick the Quality, Budget or Fast preset, or choose the models yourself, up to five lanes.
Each lane is a normal request, so each is priced, logged and traced separately, and a lane that fails renders an error card while its siblings finish.
Verify it worked
Open the Traces tab. Your run appears with the model that actually served it, its latency and its cost. A forked run shows one row per lane.
To confirm a saved prompt resolves, send a request with the reference and a deliberately wrong model name. A model_not_found error means the reference resolved and your override won; a prompt_not_found means it did not.
Troubleshooting
What you see | What it means |
|---|---|
The Prompts panel says "Select or create a project" | No project is active. Projects are chosen from the History control in the Images, Video or Audio composer, not from Chat |
| You used |
| No prompt with that id, or no name or handle match in that project |
| Two prompts in the project share a handle. The message names both; reference one by its |
The "Add to prompt" button is visible but disabled | The selected model declares no image input. The button tells you why. Switch to a model that accepts one |
| Your brand has no key for that provider. Add one in the Vault; media keys are never pooled |
A blank error page | Check the URL. An unrecognised |
Related
Studio API reference — the agent-callable surface
The Vault — where provider keys live